

How to assemble Stone Bridge Saw?
May 20, 2025
Leave a message
Hey there! As a supplier of Stone Bridge Saws, I'm super excited to walk you through the process of assembling one. Whether you're a professional stonemason or a DIY enthusiast looking to take on a big project, getting your Stone Bridge Saw up and running is crucial. So, let's dive right in!
Preparation
Before you start assembling your Stone Bridge Saw, it's important to make sure you have everything you need. First off, check the package to ensure that all the parts are included. You should have a detailed instruction manual, which is your best friend during this process. Also, gather the necessary tools. You'll likely need wrenches, screwdrivers, and maybe a hammer. Make sure you have a clean, flat, and spacious area to work in. Safety is key, so don't forget to wear safety goggles and gloves.
Unpacking and Inspection
Carefully unpack all the components of your Stone Bridge Saw. Lay them out in an organized manner so you can easily identify each part. Inspect each piece for any damage or defects. If you notice anything wrong, don't hesitate to contact us right away. We're committed to providing you with high - quality products, and we'll make sure to sort out any issues.
Base Assembly
The base is the foundation of your Stone Bridge Saw, so getting it right is essential. Start by assembling the main frame of the base. Use the provided bolts and nuts to secure the pieces together. Make sure the frame is square and level. You can use a spirit level to check this. Tighten all the bolts firmly, but don't over - tighten as it could damage the threads.
Once the main frame is assembled, attach the support legs. These legs will provide stability to the saw. Again, use the appropriate tools to secure them in place. Double - check that the legs are evenly spaced and that the base is sitting flat on the ground.
Column Installation
Next up is the column. The column is what holds the saw blade and allows for vertical movement. Carefully lift the column and align it with the pre - drilled holes on the base. Insert the bolts and nuts and start tightening them. As you do this, make sure the column is perfectly vertical. You can use a plumb line to ensure accuracy.
The column usually has some internal components that need to be installed. This might include the hydraulic or electric system for the vertical movement. Follow the instructions in the manual to connect these components properly. Make sure all the connections are secure and that there are no loose wires or hoses.
Crossbeam Attachment
The crossbeam is an important part of the Stone Bridge Saw as it allows for horizontal movement of the saw blade. Lift the crossbeam and place it on top of the column. There are usually guides or tracks on the column that the crossbeam will slide into. Make sure it fits snugly and that it can move freely along the column.
Attach the crossbeam to the column using the provided fasteners. These could be bolts, clamps, or a combination of both. Tighten them securely, but again, be careful not to over - tighten. Once the crossbeam is attached, test its movement to make sure it slides smoothly.
Saw Blade Mounting
Now, it's time to mount the saw blade. First, make sure the saw blade is the correct size and type for your Stone Bridge Saw. Carefully place the saw blade on the arbor of the saw motor. Use the appropriate arbor nut to secure the blade in place. Make sure the blade is centered and that it rotates freely without any wobbling.
Before tightening the arbor nut completely, check the alignment of the blade. The blade should be parallel to the cutting surface of the saw. You may need to make some adjustments using the alignment screws or mechanisms provided. Once you're satisfied with the alignment, tighten the arbor nut firmly.
Electrical and Hydraulic Connections
If your Stone Bridge Saw is electrically powered, you'll need to make the electrical connections. First, locate the electrical panel on the saw. Follow the wiring diagram in the manual to connect the power cord, motor, and any other electrical components. Make sure all the connections are tight and that there are no exposed wires.

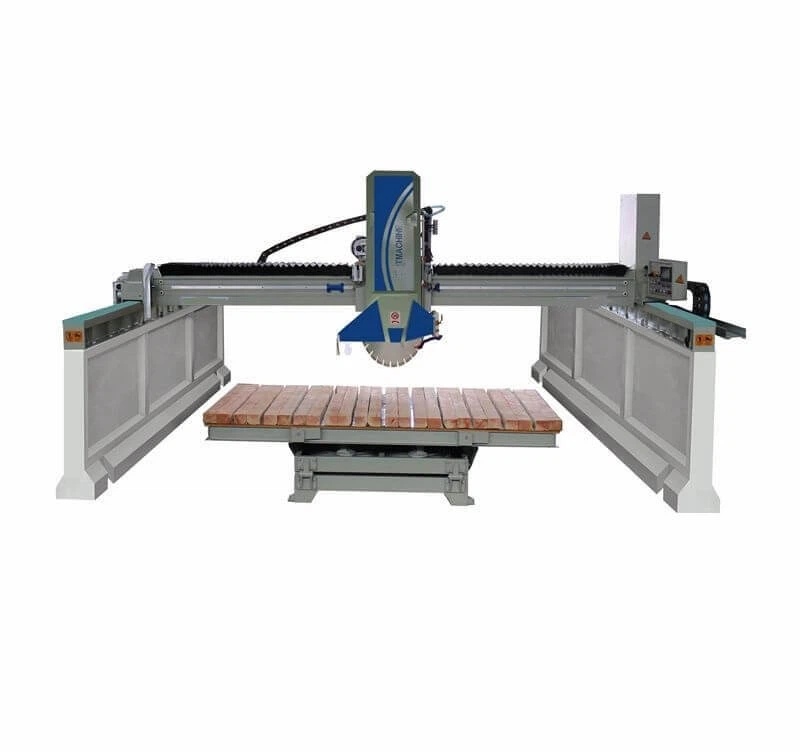
For saws with hydraulic systems, connect the hydraulic hoses to the appropriate valves and cylinders. Check for any leaks by turning on the hydraulic pump and pressurizing the system. If you notice any leaks, tighten the connections or replace the seals as needed.
Testing and Calibration
Once you've assembled all the components and made the necessary connections, it's time to test your Stone Bridge Saw. Before you turn it on, double - check all the connections and make sure everything is secure. Turn on the power and test the vertical and horizontal movements of the saw blade. Make sure the blade rotates smoothly and that there are no unusual noises or vibrations.
You may also need to calibrate the saw for accurate cutting. This could involve adjusting the cutting depth, angle, and speed. Refer to the manual for specific instructions on how to calibrate your particular model of Stone Bridge Saw.
Conclusion
Assembling a Stone Bridge Saw may seem like a daunting task, but if you follow the steps carefully and use the provided manual, you'll have it up and running in no time. At our company, we're dedicated to providing you with high - quality Stone Bridge Saws and excellent customer support. If you have any questions or need further assistance during the assembly process, don't hesitate to reach out to us.
We offer a wide range of Stone Bridge Saws, including the Bridge Saw Stone Tile Cutter, the Bridge Miter Saw, and the CNC Bridge Saw Machine With Camera. These machines are designed to meet the diverse needs of our customers, whether you're working on small - scale projects or large - scale commercial jobs.
If you're interested in purchasing a Stone Bridge Saw or have any questions about our products, feel free to contact us. We're always happy to help you find the right machine for your needs and assist you with the assembly process.
References
- Stone Bridge Saw Instruction Manual
- Industry best practices for stone cutting machine assembly
Send Inquiry